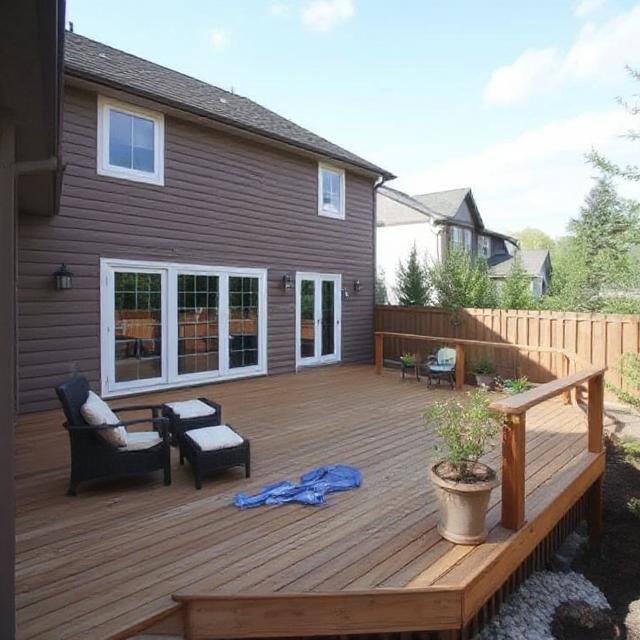
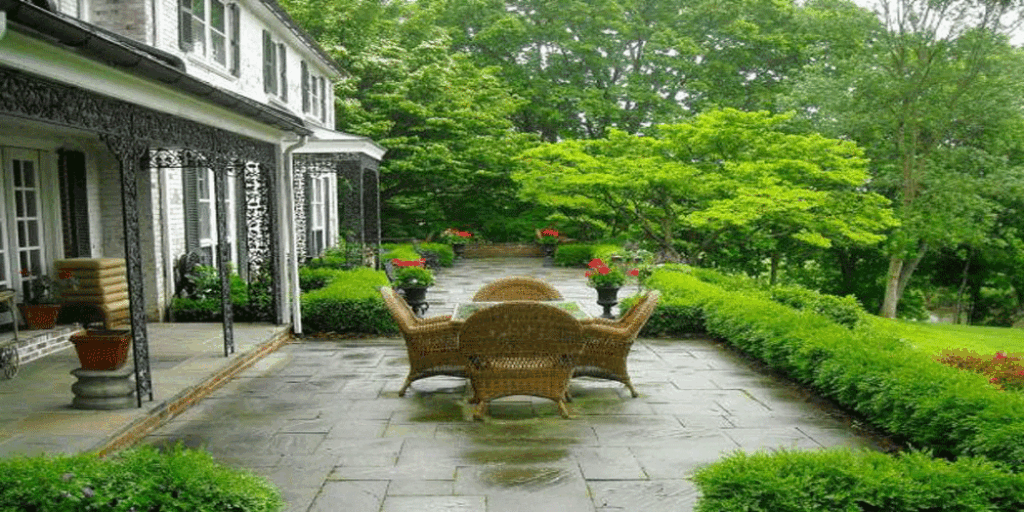
How to Build a Backyard Deck: A Comprehensive Guide for US Homeowners
A backyard deck is more than just an outdoor structure; it’s an extension of your living space, a hub for entertaining, relaxation, and enjoying the great outdoors. For US homeowners, building a deck can be a rewarding DIY project, adding significant value and appeal to their property. While the prospect might seem daunting, breaking it down into manageable steps makes it achievable. This guide will walk you through the essential stages of building a backyard deck, focusing on typical US regulations and best practices.
1.Planning and Design: The Foundation of Your Backyard Deck
Before you even think about cutting wood, meticulous planning is crucial. This stage will define your backyard deck ideas and ensure a smooth building process.
- Define Your Needs and Desires:
- Purpose: What will the deck be used for? Dining, grilling, lounging, hot tub, kids’ play area? This influences size, shape, and features.
- Size and Shape: Sketch out your ideas. Consider how the deck will flow from your home and interact with your yard. Do you envision a small, intimate space, or a sprawling area for large gatherings?
- Height: Will it be ground-level, elevated, or multi-tiered? This significantly impacts foundation requirements.
- Material:
- Pressure-Treated Lumber: The most common and affordable choice for framing, offering good resistance to rot and insects.
- Decking Materials:
- Pressure-Treated Lumber: Cost-effective, but requires regular staining/sealing.
- Cedar/Redwood: Naturally rot and insect resistant, beautiful, but more expensive and still requires maintenance.
- Composite Decking: Made from recycled plastics and wood fibers.3 Low maintenance, highly durable, but higher upfront cost. Many homeowners look for backyard deck ideas on a budget, and composite often isn’t the primary choice here, though its longevity can offer long-term savings.
- PVC Decking: Fully synthetic, ultra-low maintenance, but often the most expensive.
- Location and Orientation:
- Sunlight: Where does the sun hit throughout the day? Do you want sun or shade?
- Privacy: Consider sightlines from neighbors.
- Access: How will people get onto and off the deck (from the house, to the yard)?
- Drainage: Ensure the deck won’t impede water flow away from your house.
- Budgeting: Be realistic about costs. Factor in lumber, decking, fasteners, footings, permits, tools, and potential professional help. This is where backyard deck ideas on a budget become critical. Simple designs, standard lumber sizes, and doing the work yourself are key to saving money.
2. Permits and Regulations: Don’t Skip This Step!
This is a non-negotiable part of building a deck in the USA. Ignoring permits can lead to fines, demolition orders, and issues when selling your home.
- Contact Your Local Building Department: This is your first and most important call. They will inform you about:
- Required Permits: Most decks over a certain height or size require a building permit. Even ground-level decks might need one depending on local codes.
- Building Codes: Learn about frost line depths (how deep footings must go to prevent frost heave), setback requirements (how far from property lines your deck must be), railing height requirements, ledger board attachment rules, and stair regulations.
- Inspections: Understand the inspection schedule (e.g., footing inspection, framing inspection, final inspection).
- HOA Regulations: If you live in a community with a Homeowners Association, check their specific rules regarding deck size, materials, and appearance.
- Property Surveys: Have a copy of your property survey to confirm property lines and utility easements. Call 811 (Dig Safe) before you dig to locate underground utilities.
3.Foundation and Footings: The Critical Support
The stability and longevity of your deck depend entirely on a solid foundation.
- Marking the Layout: Use stakes and string to accurately outline the deck’s perimeter and the locations for your footings. Double-check all measurements.
- Digging Post Holes:
- Depth: Dig holes to the depth specified by your local building code for the frost line. This is typically 24-48 inches deep in most of the US, but can be much deeper in colder climates.
- Width: The width will depend on your footing size (e.g., 8-12 inches diameter).
- Bells/Pads: Some codes require a wider base (bell-shaped bottom) or a pre-cast concrete pad at the bottom of the hole for better load distribution.
- Pouring Concrete Footings:
- Gravel Base: Pour 4-6 inches of gravel into the bottom of each hole for drainage.
- Sonotubes/Forms: Place cardboard concrete forms (Sonotubes) into the holes, ensuring they are plumb and extend a few inches above ground level to keep wood away from moisture.
- Pour Concrete: Fill the forms with concrete, ensuring it’s level.
- Post Anchors: Before the concrete sets, insert approved post anchors (metal brackets) into the wet concrete. These will secure your wooden posts above the concrete, preventing rot. Ensure they are perfectly aligned. Allow concrete to cure fully (typically 7-10 days) before proceeding.
4. Framing the Deck: Building the Structure
This involves attaching the deck to your house (if applicable) and constructing the joist system.
- Ledger Board (for Attached Decks):
- Location: Mark the ledger board’s position on your house, ensuring a slight slope away from the house (1/4 inch per foot) for drainage.
- Flashing: Install self-adhesive flashing (ice and water shield) onto the house framing before attaching the ledger board. This is crucial for preventing water intrusion behind the ledger.
- Attachment: Fasten the ledger board directly to the house’s band joist using approved ledger fasteners (e.g., structural screws or lag bolts) with washers, not nails. Use a level to ensure it’s perfectly straight.
- Posts: Cut treated lumber posts to length. Attach them to the post anchors using appropriate fasteners. Ensure all posts are plumb and square.
- Beams: Attach beams (often doubled or tripled lumber for strength) to the tops of the posts using approved beam-to-post connectors or by notching the posts (check code for specific requirements). Beams will support your joists.
- Joists:
- Spacing: Lay out your joists on top of the beams or within joist hangers on the ledger board. Common spacing is 16 inches on center, but check your local code or span tables for your specific lumber size and decking material.
- Attachment: Attach joists to the ledger board using joist hangers and proper hanger nails. Secure them to the beams using hangers or by toenailing (check code).
- Cantilevers: If your deck design includes joists extending past the last beam (cantilevering), ensure you adhere to code-specific limits (typically no more than one-fourth of the joist’s total length).
- Blocking/Bridging: Install blocking (short pieces of joist material) between joists at mid-span, or where code requires, to prevent twisting and provide rigidity.
- Rim Joists/Band Boards: Install rim joists around the perimeter of the frame, flush with the ends of the joists, to finish the framing.
5. Decking Installation: Choosing Your Surface
Now for the visible surface!
- Starting Point: Begin laying decking boards from the house side, or from the most visible edge.
- Fastening:
- Screws: Use only approved deck screws (ACQ-compatible for pressure-treated lumber, or specific screws for composite/PVC). Predrill pilot holes for composite decking or near board ends to prevent splitting.
- Hidden Fasteners: For a cleaner look, consider hidden fastening systems that clip into grooves on the side of the decking boards. This is particularly popular with composite and PVC decking.
- Gaps: Maintain consistent gaps between decking boards (typically 1/8 to 1/4 inch) to allow for drainage and expansion/contraction. Use decking spacers.
- Overhang: Let the decking boards overhang the rim joists slightly, then trim them neatly with a circular saw after installation.
6. Railings and Stairs: Safety First!
Most decks above a certain height (typically 30 inches above grade) require railings. Stairs are essential for access.
- Railing Posts: Install railing posts (often 4x4s) securely. They can be mounted to the outside of the rim joist or run down through the deck frame to the beams/joists.
- Railing Height: Check local code; typically 36 inches high for residential decks.
- Balusters/Pickets: Install balusters or pickets. The maximum gap between them is usually 4 inches (the “4-inch sphere rule” – a 4-inch sphere should not be able to pass through).
- Handrails: Ensure handrails are securely fastened and meet code requirements for graspability.
- Stairs:
- Stringers: Cut stair stringers accurately. These are the notched pieces that support the treads.
- Treads: Attach stair treads to the stringers.
- Risers: If required by code, install risers (vertical pieces between treads).
- Railings: Stairs also typically require handrails and balusters.
7. Finishing Touches: Protecting Your Investment
- Clean Up: Remove all sawdust, debris, and stray fasteners.
- Stain/Seal (for Wood Decks): For pressure-treated lumber, allow it to dry out for a few months (follow manufacturer’s recommendations) before applying a high-quality stain or sealant. This protects the wood from UV damage, moisture, and rot, extending its life and maintaining its appearance. Composite and PVC decks generally do not require staining or sealing.
- Lighting: Consider adding deck lighting for ambiance and safety.
- Landscaping: Integrate your new deck with your backyard landscaping.
Backyard Deck Ideas: Inspiration for Your Space
Beyond the construction, consider these concepts to truly personalize your deck:
- Multi-Level Decks: Ideal for sloped yards or creating distinct zones (e.g., dining level, lounging level).
- Built-in Seating: Benches integrated into the railing system save space and offer a cohesive look.
- Pergolas or Awnings: Provide shade and a focal point.
- Privacy Screens: Lattice, horizontal slats, or planter walls can create intimate zones.
- Outdoor Kitchens/Grill Stations: Elevate your entertaining game.
- Fire Pits: Built-in or standalone, fire pits add warmth and ambiance. Ensure proper fire safety and material clearances.
- Planter Boxes: Integrate greenery directly into your deck design.
Read the Details About Backyard Deck Ideas
Backyard Deck Ideas on a Budget: Making Your Dream Affordable
Building a deck doesn’t have to break the bank. Here’s how to save money:
- Keep it Simple: A rectangular, single-level deck is far more cost-effective than complex shapes, multiple levels, or extensive curves.
- Standard Lumber Sizes: Stick to common dimensions (2x6s, 2x8s, 4x4s) which are typically more affordable.
- Pressure-Treated Lumber: While it requires more maintenance than composite, pressure-treated pine is significantly cheaper upfront for both framing and decking.
- DIY Labor: The biggest cost saver is doing the work yourself. If you’re comfortable with tools and have the time, this will dramatically reduce expenses.
- Phased Construction: If your dream deck is large, consider building it in phases. Start with a smaller, functional area, and expand later as budget allows.
- Strategic Railings: If code allows, a low-profile, ground-level deck might not require railings, saving material and labor costs.
- Basic Finishes: Opt for a simple stain or paint over expensive sealants or finishes.
- Shop Around: Compare prices for lumber and materials from different suppliers. Sometimes, independent lumber yards can offer better prices than big box stores for bulk orders.
Read the Details About Backyard Deck Ideas on a Budget
Building a backyard deck is a substantial project, but the satisfaction of creating a beautiful, functional outdoor living space for your home is immensely rewarding. By planning carefully, adhering to local codes, and executing each step meticulously, you can build a backyard deck that will be enjoyed for years to come.


